 Loading... Please wait...


- Home
- Custom PC Build
- Custom Gaming PC build service

Custom Gaming PC build service
Submit online form
Product Description
If you are not redirected automatically, follow this link to Redrive PC Build and Repair.
|
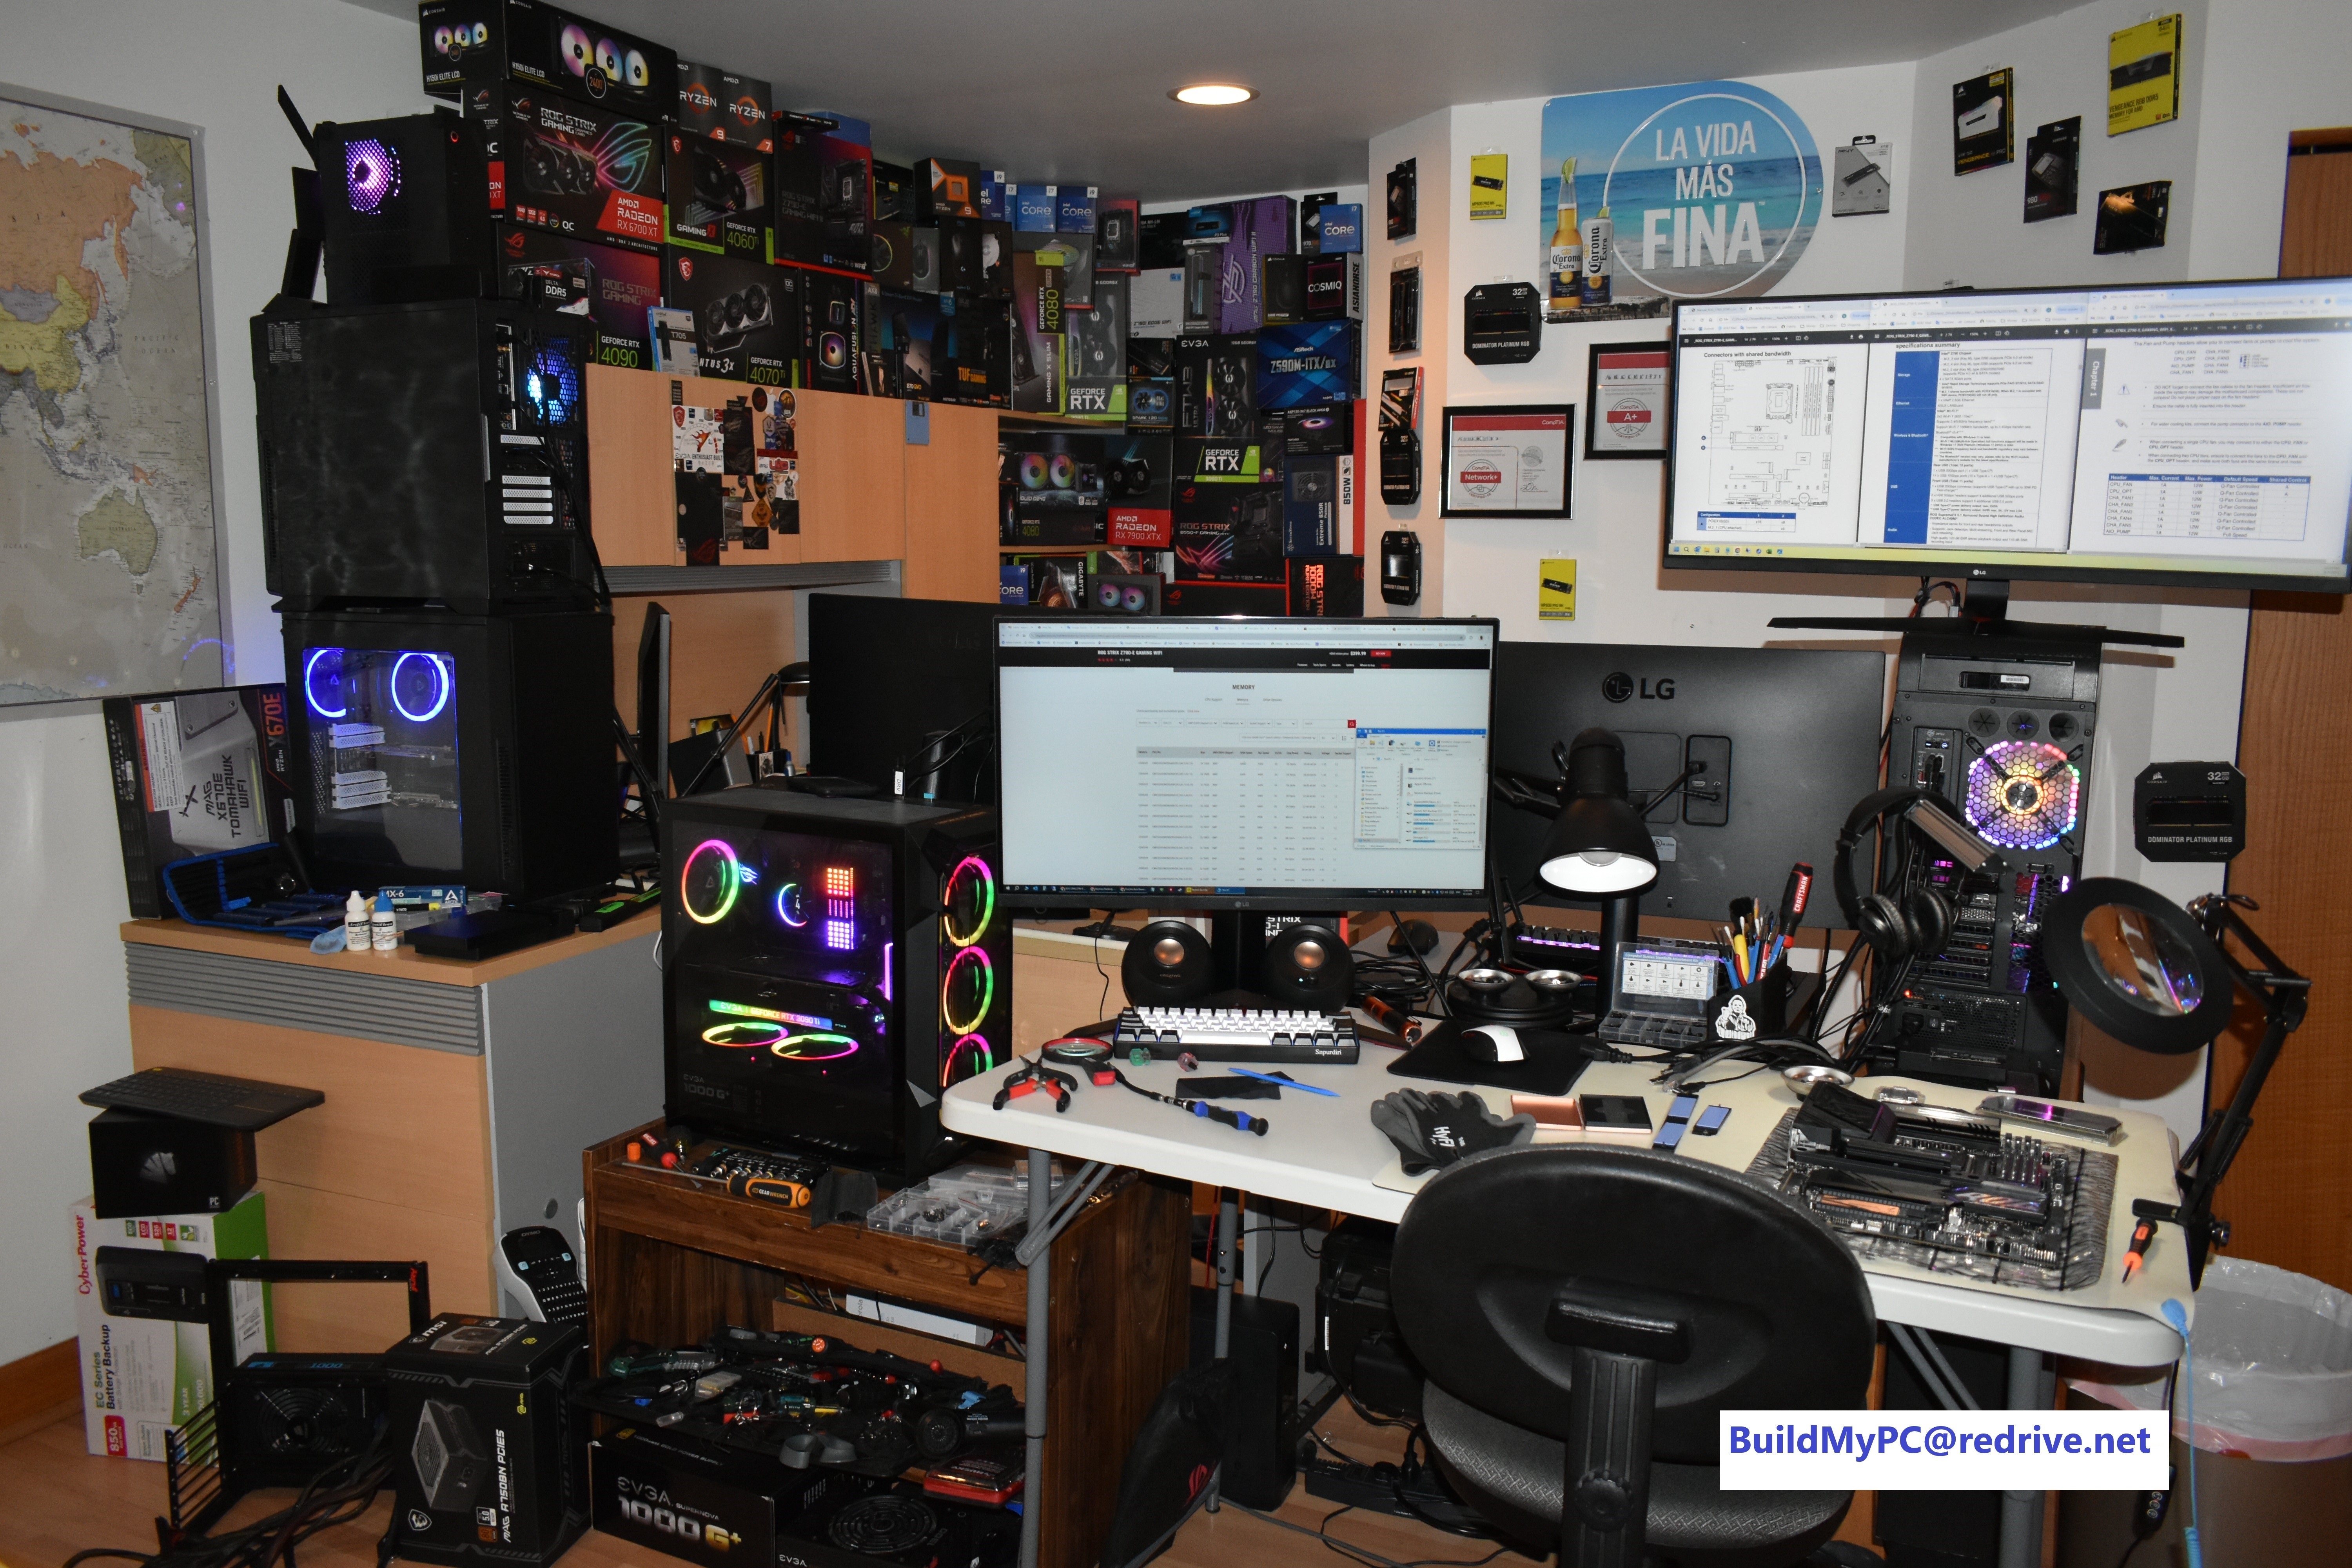
Let me build for you a perfect gaming PC for any budget. I like to play computer games. For the best gaming experience, I build gaming PCs for me, my friends and friends of my friends for many years. I just enjoy my favorite hobby -- doing magic by transforming pieces of electronics into a working computer which can do amazing things. But as Joker said in The Dark Knight - “If you're good at something, never do it for free." So, I decided to start a little business with gaming PC builds.Contact me by email at BuildMyPC@redrive.net. To get started, please email me your acceptable budget and desired new or used components (if any), and we can start conversation and arrangement. Telling me what games you plan to play and desired resolution/fps also helps to choose the perfect configuration. I will do my best to find the most satisfactory PC gaming solution for you. The posted pictures for this service product are previously built gaming systems - just to show what I can do. Please read detailed service terms and conditions below. At the end I posted some tips If you decide to build the computer by yourself. Sincerely, Andrey K., computer enthusiast. September 1st, 2024. |
| Service Terms and Conditions Important: Warranty, Shipping & Returns policies published on this website for Redrive Inc main business does not apply for this service. Read specific terms for PC build below. Please do not register as a customer on this website - we are using the e-commerce platform for advertisement only and do not sell anything online on redrive.net. For business we are using offline software and process the credit cards through PayPal.
|
| Pricing Basic service – 100$* Include system assembly, power up and check of correct all components recognition in BIOS, update BIOS to latest version and make all necessary parameters change for best gaming performance. For the basic system functionally testing Windows 11 setup will be preloaded and set to bypass the internet requirements during setup. By default, it will be Windows 11 Home edition (without product key). By request I can preinstall different versions of Windows or preinstall with the product key (you have to purchase the product key by yourself). If the build includes extra storage besides the system disk, it will be initialized and formatted. You have to finish Windows and Drivers installation by yourself. Complete service – 180$* Include Basic service plus Operating system and Drivers installation, Windows configuration for best performance, Memory test, Storage Benchmark, System Benchmark, 45 min System full load stress test. I will install additional software by request. Bootable system restore USB drive with the recovery software and system disk backup image is included (attached) inside the system block. *Prices above only for standard PC cases (no modification required). DIY PC case kits cost extra $50. Custom case build prices vary - approximately 50$ per hour, but no more than $500. Note: I do not work with custom liquid-cooling loop kits and liquid cooling motherboard monoblocks – I think just for gaming it’s too much. After a few experiments I found out that with proper airflow design standard AIO liquid CPU coolers or tower air CPU coolers are more than enough for all intense gaming. |
| Payments Payment must be done before building. After we agreed on everything you will receive by email invoice from Redrive Inc. Invoice will include Labor (build service), Components cost and Shipping cost. After payment is cleared, I will start ordering parts (if needed) and building. We accept Credit cards, PayPal, Wire transfers and Personal checks. Transaction fee applies for credit card payments. Sending your parts to my location in order for me to build is acceptable and preferred. Components which you are sending for the build will be shown at $0 cost on invoice. |
| Shipping Shipping address is: Redrive Inc. Attn: PCbuild RMA#_______ 1570 Anderson Lane, Buffalo Grove, IL 60089 USA RMA# is your invoice number. Please do not ship anything to me until you get and pay the invoice. We are using UPS ground service as a standard shipping method. All shipments will be insured for a full cost of invoice. If you prefer a different shipping method, please let me know. You will get all leftover materials in the one single package with the system. To avoid shipping damage the builds with heavy graphics cards and/or heavy tower CPU coolers will be shipped with packaging materials inside the PC case to prevent components movement during drops at the time of travel. You must remove the packaging materials from inside the case before powering up the system. Warning stickers and notes will be attached. You will receive an e-mail with UPS tracking numbers once your PC build has been shipped. Redrive Inc. is not responsible for any delay caused by the shipping company. I will deliver the build to you for free if your place is in Northwestern Suburbs of Chicago, Illinois. |
| Shortage/Damage Please unpack your order and report any shortage or damage immediately. We cannot be responsible for damaged shipments not reported within 15 business days of delivery. If a package arrives in any damage, you can note the damage and call or email us immediately. If the driver is still present, ask him that the damage be noted. Take a picture of damage (if possible). This will expedite shipping claims. Do not discard product or packaging. The carrier may wish to inspect the package before paying a claim. |
|
Warranty, Returns and Support |
| Tips if you decide to build your perfect gaming machine by yourself (DIY) Choosing components: Make sure on 100% that all chosen components are compatible: Start planning your build from a CPU. I do not have any preferences (AMD or Intel). Do research and choose what you like and budget allows. After choosing the CPU, find a motherboard that supports the chosen CPU and fits all your needs for storage and peripherals and also looks good for your taste. Read the motherboard manual carefully - pay special attention to * notes. Next choose the memory. I recommend picking memory from a supported memory list per CPU model published by the motherboard manufacturer. Same type of DDR memory not from the list most likely will work fine too, but in rare cases you might have stability problems with XMP / Expo overclocking profiles (I had indeed). For gaming I recommend 1 or 2 memory sticks configurations. 16GB memory size is the minimum for gaming systems, I recommend 32GB. I personally prefer to use 2x32GB RAM configuration for my builds and forget about RAM as a bottleneck. Faster RAM is better (of course), but not making a very significant difference. Next step is the Graphics card (GPU). Usually, it is the most expensive component in gaming computers, so here your budget is mostly taking effect. The choices are very wide, but if you know what games you will play, go to the game website, check hardware requirements and start choosing GPU based on that information. Next step – CPU cooler. AIO liquid coolers and tower air coolers both are working well. Do research and choose for your taste. If you are thinking about serious overclocking, I recommend you to choose a liquid cooler. If you choose an air cooler, for a standard case I recommend coolers with at least 180W TDP (with an open-air system you can go with smaller cooler). Next step – storage. I do not recommend using SATA storage devices – this is yesterday's technology. PCIe M.2 SSD sticks now is the best storage solution in my opinion. The only 2 reasons to use a SATA device for storage – very tight budget or you need 8+TB storage for a low price. Next step – Case and Fans. The choices are very wide – choose for your taste. Most important: check case specification to find out if all previously chosen components (Motherboard, GPU, CPU cooler) will fit in the case. Be aware: usually in case specification presents the max GPU length – this is the max length of a suitable graphics card if nothing is installed behind the GPU. If you add a case fan behind the card, subtract at least 25 mm from this dimension. If you add a radiator behind the card, subtract at least 56 mm from this dimension. Also check what fans are included in the chosen case and decide if you need to buy extra fans. I recommend installing as many fans as allowed for best cooling. Do research to choose the best airflow for your system (depends on chosen CPU cooler). Next step – choose a power supply. Check the recommended PSU wattage for chosen graphics card and do not go lower. I suggest adding 100W above recommended PSU wattage. Make sure PSU will fit in your case. These are PSU form factors: ATX, SFX/SFX-L, Mini ITX/Flex ATX/1U, TFX. ATX form factor PSUs lengths are vary, so check ‘Max PSU Length’ in chosen case specification. Check if the power supply has all necessary connectors for chosen components. And if you choose the large case (ATX full tower or similar) make sure all chosen PSU cables have enough length. Budgets suggestions: Unlimited budget – buy the best available components and enjoy gaming. After years you can sell components (or the whole system) and buy a best one again. Always do research – most expensive not necessarily means the best. On the budget – according to your budget buy the midrange graphics card and midrange most recent generation CPU (I5/I7 or Ryzen 5/7) and last generation memory. This configuration will allow you to play all games on High/Medium settings on 1440p and later upgrade the Graphics card and keep the rest of the system. Saver/Very tight budget – save on everything and invest as much as possible into graphics card. Buy the oldest available generations of CPU/RAM (I5/Ryzen5 recommended), SATA SSD and other not expensive components. Spend the rest on a Graphics card. This configuration allows you to get best gaming experience for the money. In my opinion, acceptable gaming experiences in now days start with systems from $1000 (system block only) plus monitor with 1440P resolution and refresh rate 144Hz or higher. Assembly suggestions: Most important tips: do not rush, plan you build steps, read the installation manual for each component, do all installations patiently and very carefully, use ESD protection (ESD gloves are the best), do not apply excessive force, do not overtighten the screws, be very careful with the screwdriver - do not touch the motherboard (one inaccurate touch with screwdriver can knock off a small component from the MB or cut the trace). If you do your 1st time build watch DIY PC build videos on YouTube before you start. In my opinion the best build order: 1) Install fans and radiator (if liquid cooler chosen) into the case. Tie the pump to the case with a cable tie, so it will not interfere with your work. Note: If you mount the radiator on top of the case you might not want to install radiator fans yet because they might interfere with ram installation and cables connecting. 2) Install the SATA drives and connect cables (if applicable). 3) Install the power supply and move the cables close to the places of connection. Also move other cables (from the front panel, fans and so on) close to places of connection. 4) Unpack the motherboard. Place the antistatic bag in which the motherboard came on the table and place the motherboard on top. 5) Install M.2 storage according to your M.2 heatsink situation (if applicable). Do not forget to remove protective film from thermal pads. 6) Install the CPU. Never touch socket pins during installation. 7) Install the CPU cooler backplate (if applicable). 8) Install Liquid cooler pump mounting components or Air cooler. For air cooler - do not forget to remove protective film and apply thermal paste (if thermal compound not pre-applied). 9) Carefully place the motherboard into the case. Do not move the motherboard back and forward if its touching case standoffs - it might damage the motherboard permanently. Read the motherboard manual for the best installation practices. 10) Tie the motherboard to the case with mounting screws. 11) Install liquid cooler pump (if applicable). Do not forget to remove protective film and apply thermal paste (if thermal compound not pre-applied). 12) Install the Memory module into the slot according to the motherboard manual. Important: If you have 2 or more memory modules install only one for now. Some motherboards will not boot for the 1st time with more than 1 RAM module. 13) Connect all cables (except Graphics card) 14) Install the Graphics card. Do it very accurately, do not use excess force. Always use extra support for large GPUs (with 3 fans). Connect GPU power cable. 15) Do cable management 16) Connect power cable, monitor, keyboard and mouse. 17) Power up the system. Be patient – for some motherboards it takes a while to post for the 1st time. If the system will not boot after 10 minutes refer to the motherboard manual troubleshooting section. 18) After system boot into BIOS do 'save changes and reset' option 19) After system reboot: If you have more than one memory module shut down the system and disconnect power cable, otherwise go to step 21 20) Install all memory modules, connect power cable and power up the system 21) Update BIOS to latest version 22) After the BIOS update, change BIOS settings as needed. There are plenty of settings to play with. Important: Do not change the setting if you do not know what it exactly does. Do research before you change anything in BIOS. But you always need to enable the XMP/EXPO memory overclocking profile if your RAM supports it. It is usually disabled by default in BIOS. 23) You are good to go install operating system and start playing games Operating system and drivers installation suggestions I recommend downloading the recent drivers from the motherboard manufacturer website and GPU manufacturer website because drivers which came in component’s packages are usually outdated. I recommend connecting ethernet cable or connecting to Wi-Fi only after Windows and all drives are completely installed. 1st thing you do after connected to internet is the Windows update. To bypass internet requirements during Windows 11 installation, do this: In the "Let's connect you to a network" screen, press Shift+F10 to launch cmd; Type the following command: OOBE\BYPASSNRO After successful execution, the system will restart and restart the OOBE session box, When you reach the "Let's connect you to a network" screen, click "I don't have Internet", continue to click "limited setup”, accept the license agreement and continue to create a local user account. |
 |
